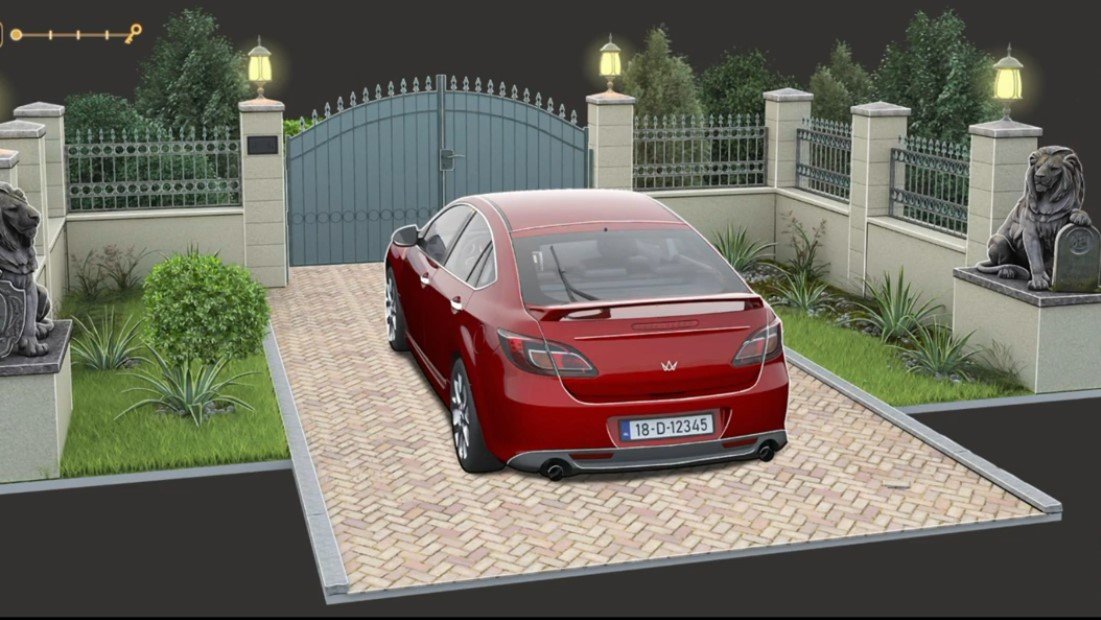
Here you will get solutions and step by step guide for Rooms & Exits Chapter 3 Level 12. In this puzzle developed by Webelinx Games. Every clue tells a story, and every puzzle brings you closer to the truth. Join Fiona, a brave journalist with a sharp eye for hidden secrets, as she investigates mysterious cases filled with unexpected surprises. This level belongs to the Murder Dressed in White category and is the Driveway level.
Search for clues, solve challenging puzzles, and uncover the secrets hidden in every location. Each level offers a fresh mystery that will test your observation skills and logical thinking. Whether you enjoy detective stories, escape room challenges, or brain-teasing adventures, this game delivers an exciting experience from start to finish.

Rooms & Exits Driveway – Chapter 3 Level 12 Solution
The following guide explains how to solve Rooms and Exits Driveway step by step.
If you get stuck at any point, leave a comment below. Our team will be happy to help you find the solution.
Phase 1: Collecting Levers and Initial Tools
- Step 1: Check the wooden bench on the right side of the driveway.
- Pick up the pliers.
- Step 2: Go to the palm tree near the parked car.
- Pick up the lantern.
- Step 3: Open the lantern in your inventory.
- Dismantle it to get a paper note.
- Step 4: Find the first red lever in the bush near the main path.
- Step 5: Go to the angel statue.
- Pick up the second red lever near its base.
- Note: The base of the statue shows a pattern with five vertical lines for adjustment.
Phase 2: Underground Hatch and Plumbing Puzzle
- Step 6: Go back to the bush where the first lever was found.
- Use pliers to cut the roots and open the metal hatch.
- Step 7: Solve the 5-line adjustment puzzle on the hatch:
- Line 1: move up 2 times
- Line 2: leave at bottom
- Line 3: move up 4 times
- Line 4: move up 1 time
- Line 5: move up 3 times
- Step 8: The hatch opens and reveals the plumbing system.
- Step 9: Place both red levers into the valve slots inside the hatch.
- Step 10: Use the paper note and match it with the symbols on the mansion entrance.
- Adjust the levers to the correct positions.
- Step 11: This stops the water flow and drains the fountain.
Phase 3: Compass Gate Code and Escape
- Step 12: Go to the drained fountain.
- Take the car keys from the center basin.
- Step 13: Use the keys to unlock the car.
- Step 14: Turn on the headlights inside the car.
- Set the left dash lever to high beam.
- Step 15: Go to the main gate.
- Use the light to see the compass plate and statues.
- Step 16: Observe the clues:
- Left lion is near a shield
- Right lion is near a tombstone
- Step 17: Enter the code on the keypad:
- Left side is East with shield, right side is West with tombstone.
- Step 18: The gate opens.
- Step 19: Go back to the parking spot.
- Pick up the mansion key.
- Step 20: Use the mansion key on the front door to escape the level.
Video Walkthrough
Congratulations on completing Chapter 3 – Level 12! Click here to unlock Chapter 3 – Level 13.