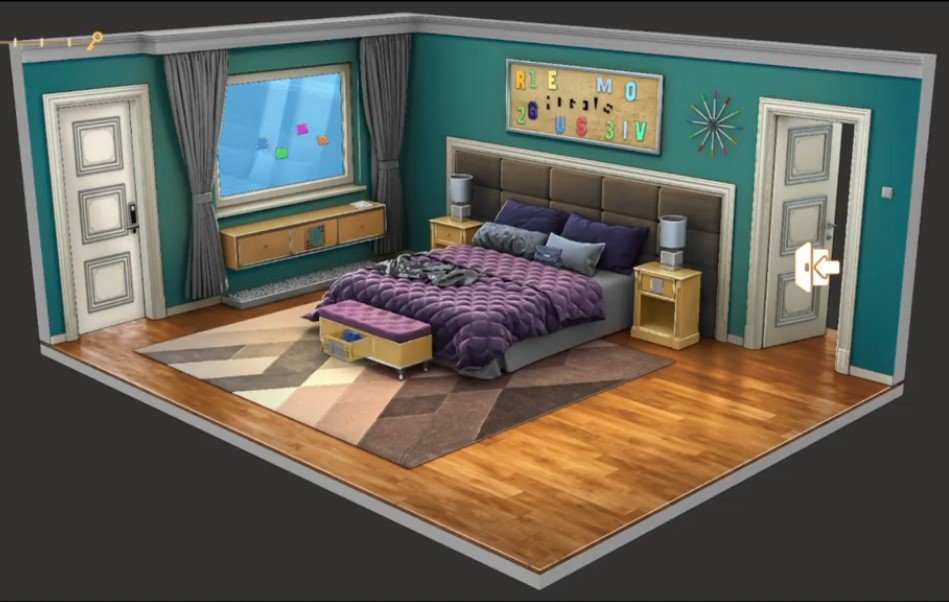
Here you will get solutions and step by step guide for Rooms & Exits Chapter 3 Level 22. In this puzzle developed by Webelinx Games. Every clue tells a story, and every puzzle brings you closer to the truth. Join Fiona, a brave journalist with a sharp eye for hidden secrets, as she investigates mysterious cases filled with unexpected surprises. This level belongs to the Murder Dressed in White category and is the Master Bedroom level.
Search for clues, solve challenging puzzles, and uncover the secrets hidden in every location. Each level offers a fresh mystery that will test your observation skills and logical thinking. Whether you enjoy detective stories, escape room challenges, or brain-teasing adventures, this game delivers an exciting experience from start to finish.

Rooms & Exits Master Bedroom – Chapter 3 Level 22 Solution
The following guide explains how to solve Rooms and Exits Master Bedroom step by step.
If you get stuck at any point, leave a comment below. Our team will be happy to help you find the solution.
Phase 1: Collecting the Purses
- Step 1: Pick up the black purse from the bed.
- Step 2: Solve the rotating tile puzzle on the bench.
- Step 3: Open the bench and take the blue purse.
- Step 4: Go to the bedside table.
- Step 5: Solve the math puzzle to open the drawer.
- Step 6: Take the crumpled paper.
- Step 7: Dismantle the paper in your inventory to reveal the color clue.
- Step 8: Check the cabinet under the window.
- Step 9: Take the white note.
- Step 10: Solve the sliding tile puzzle and leave the cabinet open.
Phase 2: Walk-in Closet Puzzle
- Step 11: Go into the walk-in closet.
- Step 12: Place the black purse and blue purse on the shelf.
- Step 13: Rearrange the purse handles using the paper clue.
- Step 14: Open the drawer and take the lightbulb.
- Step 15: Place the lightbulb in the dressing table mirror.
- Step 16: Turn on the light.
- Step 17: Note the color order:
- Blue
- Violet
- Yellow
- Green
- Step 18: Return to the first room.
- Step 19: Press the window cabinet buttons in the same order:
- Blue → Violet → Yellow → Green.
- Step 20: Take the letter G.
Phase 3: Final Puzzle and Escape
- Step 21: Go to the letter board above the bed.
- Step 22: Place the letter G and arrange the letters to spell ROGEVS.
- Step 23: Go to the pink wardrobe in the closet.
- Step 24: Enter the password ROGEVS.
- Step 25: Open the wardrobe and take the dress.
- Step 26: Hang the dress with the other dresses.
- Step 27: Rearrange the dresses.
- Step 28: Take the pink gem.
- Step 29: Place the pink gem into the display panel.
- Step 30: Use the wall clock clue to arrange the gems correctly.
- Step 31: The puzzle reveals the code 7423689.
- Step 32: Go to the electronic pattern pad.
- Step 33: Draw the pattern:
- 7 → 4 → 2 → 3 → 6 → 8 → 9.
- Step 34: The symbol values are:
- Square = 2
- Circle = 8
- Star = 0
- Pentagon = 1
- Step 35: Go to the exit door keypad.
- Step 36: Enter the code 2801.
- Step 37: Open the door to complete the level.
Video Walkthrough
Congratulations on completing Chapter 3 – Level 22! Click here to unlock Chapter 3 – Level 23.