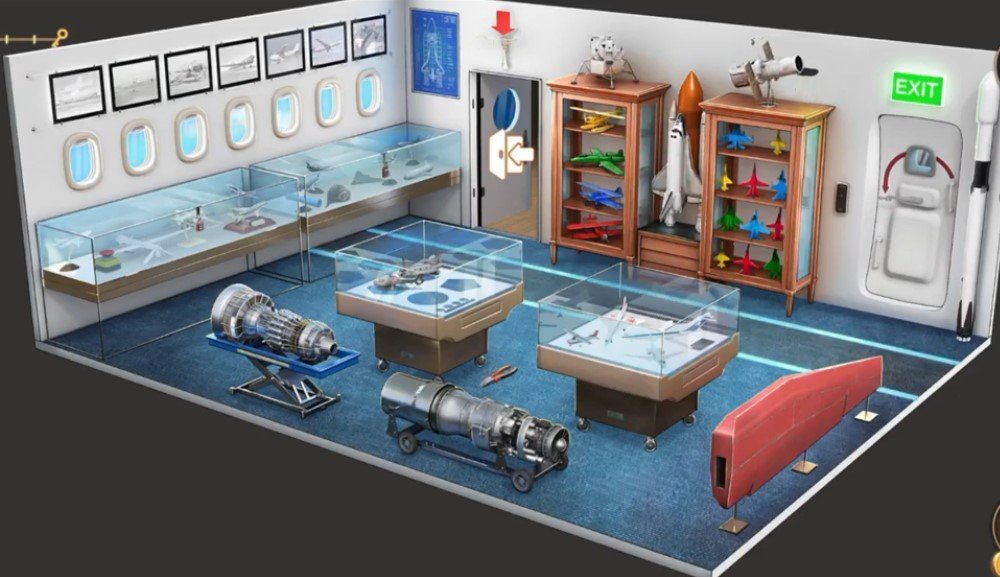
Here you will get solutions and step by step guide for Rooms & Exits Chapter 4 Level 6. In this puzzle developed by Webelinx Games. Every clue tells a story, and every puzzle brings you closer to the truth. Join Fiona, a brave journalist with a sharp eye for hidden secrets, as she investigates mysterious cases filled with unexpected surprises. This level belongs to the Pharaoh’s Bride category and is the Aeronautics Museum level.
Search for clues, solve challenging puzzles, and uncover the secrets hidden in every location. Each level offers a fresh mystery that will test your observation skills and logical thinking. Whether you enjoy detective stories, escape room challenges, or brain-teasing adventures, this game delivers an exciting experience from start to finish.

Rooms & Exits Aeronautics Museum – Chapter 4 Level 6 Solution
The following guide explains how to solve Rooms and Exits Aeronautics Museum step by step.
If you get stuck at any point, leave a comment below. Our team will be happy to help you find the solution.
Phase 1: Collecting Items
- Step 1: Pick up the pliers from the floor.
- Step 2: Go to the airplane display cabinet.
- Step 3: Match the airplane models to find the password FRAN.
- Step 4: Enter FRAN.
- Step 5: Take the light dimmer.
- Step 6: Go to the second gallery.
- Step 7: Pick up the first toy helicopter.
- Step 8: Check the paintings and trace the hidden line clues.
- Step 9: Solve the wall switch puzzle until all lights turn green.
- Step 10: The cupboard moves.
- Step 11: Take the second toy helicopter.
- Step 12: Return to the first room.
- Step 13: Place both helicopters into the glass display jar.
- Step 14: Enter the code 5238.
- Step 15: Take the aircraft wing.
Phase 2: Solving the Plane Puzzle
- Step 16: Return to the second gallery.
- Step 17: Attach the aircraft wing to the model plane.
- Step 18: Install the light dimmer into the wall panel.
- Step 19: Dim the lights.
- Step 20: Read the shadow numbers:
- III
- IX
- VI
- Step 21: The code is 396.
- Step 22: Return to the first room.
- Step 23: Enter 396 on the control box.
- Step 24: Take the crumpled paper.
- Step 25: Dismantle the paper to see the blueprint.
- Step 26: Go to the control panel.
- Step 27: Use the pliers to cut the wires in this order:
- Green
- Pink
- Black
- Blue
- Red
- Yellow
- Step 28: Take the two plane parts.
- Step 29: Return to the assembly table.
- Step 30: Build the model plane.
- Step 31: Take the ID security card.
Phase 3: Final Puzzle and Escape
- Step 32: Check the arrow clue on the glass:
- Left
- Up
- Right
- Down
- Step 33: Go to the locked glass display case.
- Step 34: Move the handle in this order:
- Step 35: Take the toy plane.
- Step 36: Return to the first room.
- Step 37: Place the toy plane on the display stand.
- Step 38: Solve the sliding plane puzzle.
- Step 39: Take the master keycard.
- Step 40: Swipe the keycard at the exit door.
- Step 41: Open the door to complete the level.
Video Walkthrough
Congratulations on completing Chapter 4 – Level 6! Click here to unlock Chapter 4 – Level 7.