Here you will get solutions and step by step guide for Rooms & Exits Chapter 5 Level 3. In this puzzle developed by Webelinx Games. Every clue tells a story, and every puzzle brings you closer to the truth. Join Fiona, a brave journalist with a sharp eye for hidden secrets, as she investigates mysterious cases filled with unexpected surprises. This level belongs to the Death on the Dancefloor category and is the Security Room level.
Search for clues, solve challenging puzzles, and uncover the secrets hidden in every location. Each level offers a fresh mystery that will test your observation skills and logical thinking. Whether you enjoy detective stories, escape room challenges, or brain-teasing adventures, this game delivers an exciting experience from start to finish.

Rooms & Exits Security Room – Chapter 5 Level 3 Solution
The following guide explains how to solve Rooms and Exits Security Room step by step.
If you get stuck at any point, leave a comment below. Our team will be happy to help you find the solution.
Phase 1: Search the Office
- Step 1: Tap the security desk and collect the Scissors.
- Step 2: Collect the Suction Cup from the desk.
- Step 3: Check the document shelves.
- Step 4: Collect Magnetic Keycard (1/2).
- Step 5: Look at the bulletin board and note the color pattern.
- Step 6: Go to the locker panel below the monitors.
- Step 7: Match the color dials to the bulletin board clue.
- Step 8: Open the drawer and collect the Small Key and USB Flash Drive.
Phase 2: Restore the Server
- Step 1: Go to the glass floor panel near the server rack.
- Step 2: Use the Suction Cup to lift the panel.
- Step 3: Collect the Wrench and Wire Strippers.
- Step 4: Go to the server cabinet.
- Step 5: Use the Small Key to unlock it.
- Step 6: Insert the USB Flash Drive into the server.
- Step 7: Use the Wire Strippers to repair the damaged wires.
- Step 8: Complete the cable routing puzzle.
- Step 9: Restore the surveillance monitors.
Phase 3: Escape
- Step 1: Look at the four security camera screens.
- Step 2: Note the code:
- Camera 1 = 4
- Camera 2 = 1
- Camera 3 = 7
- Camera 4 = 5
- Step 3: Go to the computer terminal.
- Step 4: Enter the code 4175.
- Step 5: Collect Magnetic Keycard (2/2).
- Step 6: Go to the exit door.
- Step 7: Insert Magnetic Keycard (1/2) into the left reader.
- Step 8: Insert Magnetic Keycard (2/2) into the right reader.
- Step 9: Open the door and escape to complete Level 3.
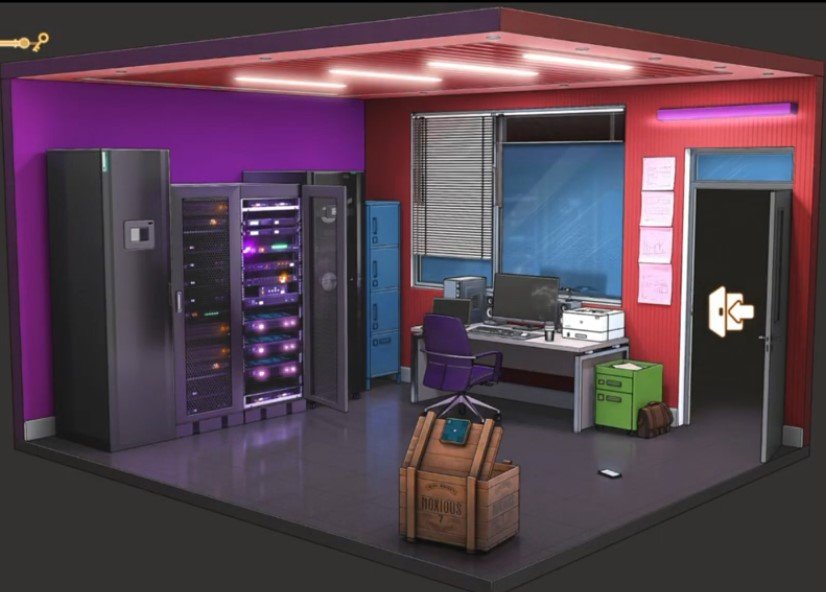
Video Walkthrough
Congratulations on completing Chapter 5 – Level 3! Click here to unlock Chapter 5 – Level 4.