Here you will get solutions and step by step guide for Rooms & Exits Chapter 1 Level 6. In this puzzle developed by Webelinx Games. Every clue tells a story, and every puzzle brings you closer to the truth. Join Fiona, a brave journalist with a sharp eye for hidden secrets, as she investigates mysterious cases filled with unexpected surprises. This level belongs to the Wicked Games category and is the Amusement Park level.
Search for clues, solve challenging puzzles, and uncover the secrets hidden in every location. Each level offers a fresh mystery that will test your observation skills and logical thinking. Whether you enjoy detective stories, escape room challenges, or brain-teasing adventures, this game delivers an exciting experience from start to finish.

Rooms & Exits Amusement Park – Chapter 1 Level 6 Solution
The following guide explains how to solve Rooms and Exits Amusement Park step by step.
If you get stuck at any point, leave a comment below. Our team will be happy to help you find the solution.
- Phase 1: Restore the Power & Collect the Control Buttons
- Restore the Electricity
- Step 1: Tap the power breaker puzzle on the wall.
- Step 2: Rotate the triangular tiles until all the colored sides match and the electricity is restored.
- Collect the First Control Button
- Step 3: Go to the mini carousel.
- Step 4: Arrange the horses in this rainbow order: Purple → Blue → Green → Yellow → Orange → Red.
- Step 5: After solving the puzzle, collect the first Control Button.
Collect the Second Control Button
- Step 6: Go to the duck shooting game.
- Step 7: Tap all the Yellow Ducks while avoiding the blue ducks.
- Step 8: Complete the mini-game to receive the second Control Button.
Collect the Third Control Button
- Step 9: Go to the cotton candy machine.
- Step 10: Rotate the pipe connectors until there is a complete path from start to finish.
- Step 11: After solving the puzzle, collect the third Control Button.
Phase 2: Find the Tools & Secret Codes
Get the Screwdriver
- Step 1: Go to the control panel near the roller coaster.
- Step 2: Insert all three Control Buttons into the empty slots.
- Step 3: Open the panel and collect the Screwdriver.
- Step 4: Note the train code 1496.
Collect the Coins
- Step 5: Go to the Ferris wheel control box.
- Step 6: Use the Screwdriver to remove the screws.
- Step 7: Enter the code 1496.
- Step 8: Pull the lever and collect the Red Coin and Purple Coin.
Get the Hidden Photo Code
- Step 9: Insert the Red Coin into the arcade machine and pull the handle.
- Step 10: Collect the Mechanical Lever Handle.
- Step 11: Use the Mechanical Lever Handle and the Purple Coin on the photo booth.
- Step 12: Collect the printed Photos.
- Step 13: Check the photos and find the hidden code 206781.
Phase 3: Arcade Games & Escape
- Win the Key
- Step 1: Go to the boxing machine.
- Step 2: Enter the code 206781.
- Step 3: Complete the punching mini-game and score over 1,900 points.
- Step 4: Collect the Key.
Complete the Bumper Car Puzzle
- Step 5: Use the Key to activate the red arcade machine.
- Step 6: Guide the red ball using this path:
- Up → Right → Down → Left → Up → Left → Up → Right → Down → Left → Up → Left → Up → Right → Down
- Step 7: Complete the maze and collect the Ring.
Win the Saw
- Step 8: Go to the ring toss game.
- Step 9: Throw the rings in this order: Orange → Yellow → Dark Blue → Light Blue.
- Step 10: Score 150 points to win the Saw.
Escape the Park
- Step 11: Go to the wooden barricade blocking the exit.
- Step 12: Use the Saw to cut through the wooden planks.
- Step 13: Open the exit gate and escape to complete the level.
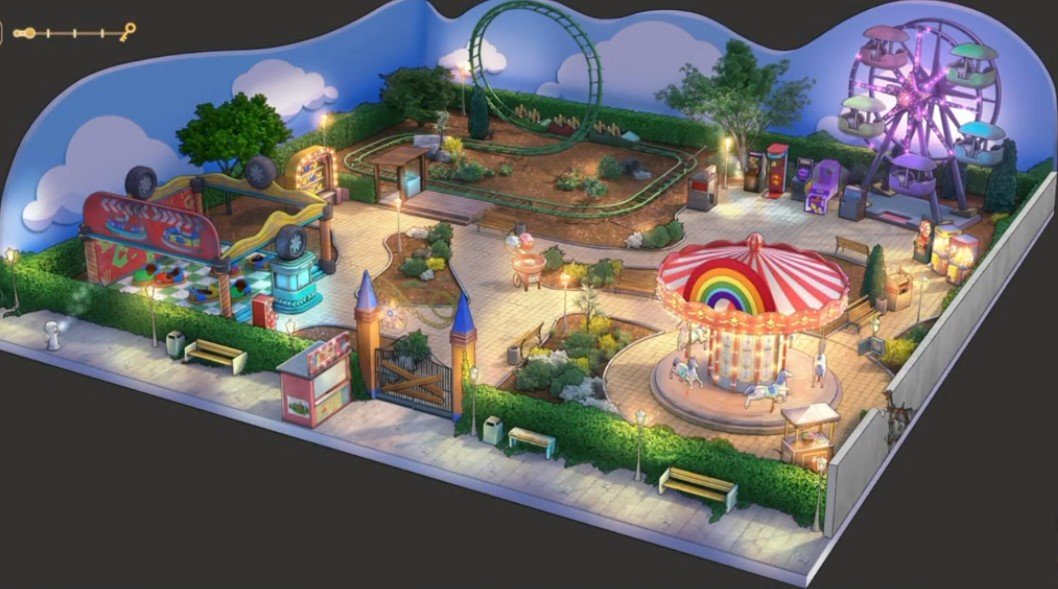
Video Walkthrough
Congratulations on completing Chapter 1 – Level 6! Click here to unlock Chapter 1 – Level 7.