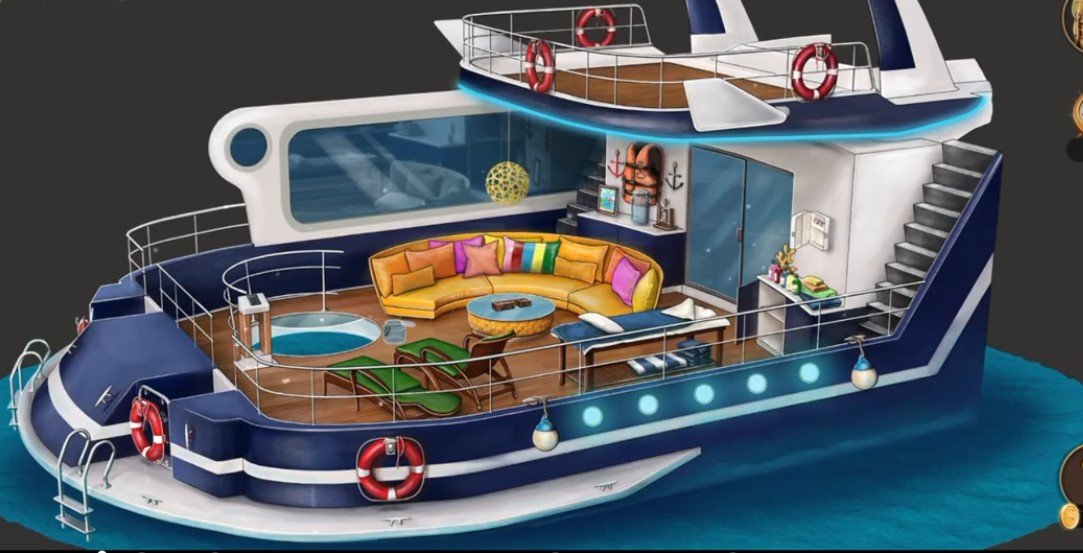
Here you will get solutions and step by step guide for Rooms & Exits Chapter 1 Level 5. In this puzzle developed by Webelinx Games. Every clue tells a story, and every puzzle brings you closer to the truth. Join Fiona, a brave journalist with a sharp eye for hidden secrets, as she investigates mysterious cases filled with unexpected surprises. This level belongs to the Wicked Games category and is the Yacht level.
Search for clues, solve challenging puzzles, and uncover the secrets hidden in every location. Each level offers a fresh mystery that will test your observation skills and logical thinking. Whether you enjoy detective stories, escape room challenges, or brain-teasing adventures, this game delivers an exciting experience from start to finish.

Rooms & Exits Yacht – Chapter 1 Level 5 Solution
The following guide explains how to solve Rooms and Exits Yacht step by step.
If you get stuck at any point, leave a comment below. Our team will be happy to help you find the solution.
Phase 1: Outer Deck Puzzles
- Collect the First Items
- Step 1: Tap the shelf on the right side of the deck and collect the Small Orange Key.
- Step 2: Check the striped pillow on the lounge sofa and remember the color order: Pink, Red, Light Blue, Yellow, Green.
Unlock the Soap Shelf
- Step 3: Tap the soap shelf on the wall.
- Step 4: Arrange the soap colors in this order: Pink → Red → Light Blue → Yellow → Green.
- Step 5: Open the hidden compartment and collect the Jar of Red Sand and the Mechanical Crank Handle.
Collect More Sand Jars
- Step 6: Use the Small Orange Key to open the First Aid box.
- Step 7: Collect the Toy Mechanical Claw and the Jar of Blue Sand.
- Step 8: Check the life vest on the wall and note the code 58137.
- Step 9: Enter 58137 on the nearby keypad and collect the Jar of Pink Sand.
- Step 10: Attach the Mechanical Crank Handle to the green lounge chair and rotate it.
- Step 11: Lift the seat and collect the Jar of Green Sand.
- Step 12: Use the Toy Mechanical Claw to grab the Jar of White Sand from the fish tank.
Complete the Sand Jar Puzzle
- Step 13: Tap the large empty glass container on the first shelf.
- Step 14: Inspect the sailboat picture beside it and note the clue Small to Big.
- Step 15: Follow the sail sizes to get the color order: White → Blue → Green → Red → Pink.
- Step 16: Pour the colored sand into the container in the correct order.
- Step 17: After completing the puzzle, collect the Wooden Cube.
Phase 2: Enter the Cabin
Unlock the Deck Drawer
- Step 1: Tap the wooden sliding puzzle on the deck floor.
- Step 2: Insert the Wooden Cube into the empty slot.
- Step 3: Slide the blocks until all symbols match the frame.
- Step 4: Open the drawer and collect the Silver Key.
- Step 5: Use the Silver Key to unlock the cabin door and enter inside.
Phase 3: Interior Cabin Puzzles
- Solve the Wine Rack Puzzle
- Step 1: Tap the desk and read the menu note showing the bottle arrangement.
- Step 2: Go to the wine rack.
- Step 3: Place all Red bottles on the top shelf.
- Step 4: Place all Green bottles on the middle shelf.
- Step 5: Place all Blue bottles on the bottom shelf.
- Step 6: Open the secret panel and collect the Golden Winding Clock Key.
Unlock the Grand Piano
- Step 7: Check the picture above the sofa and note the symbol order: Triangle, Circle, Star, Square, Asterisk.
- Step 8: Go to the white grand piano and use the Golden Winding Clock Key.
- Step 9: Set the piano symbols to Triangle → Circle → Star → Square → Asterisk.
- Step 10: Open the hidden compartment and collect the Hammer.
Escape the Yacht
- Step 11: Go to the emergency glass box near the exit.
- Step 12: Use the Hammer to break the glass.
- Step 13: Pull the emergency escape lever.
- Step 14: The exit door unlocks. Open the door to escape and complete the level.
Video Walkthrough
Congratulations on completing Chapter 1 – Level 5! Click here to unlock Chapter 1 – Level 6.