Here you will get solutions and step by step guide for Rooms & Exits Chapter 1 Level 2. In this puzzle developed by Webelinx Games. Every clue tells a story, and every puzzle brings you closer to the truth. Join Fiona, a brave journalist with a sharp eye for hidden secrets, as she investigates mysterious cases filled with unexpected surprises. This level belongs to the Wicked Games category and is the Escape Room level.
Search for clues, solve challenging puzzles, and uncover the secrets hidden in every location. Each level offers a fresh mystery that will test your observation skills and logical thinking. Whether you enjoy detective stories, escape room challenges, or brain-teasing adventures, this game delivers an exciting experience from start to finish.

Rooms & Exits Escape Room – Chapter 1 Level 2 Solution
The following guide explains how to solve Rooms and Exits Escape Room step by step.
If you get stuck at any point, leave a comment below. Our team will be happy to help you find the solution.
Find the Drawer Handle
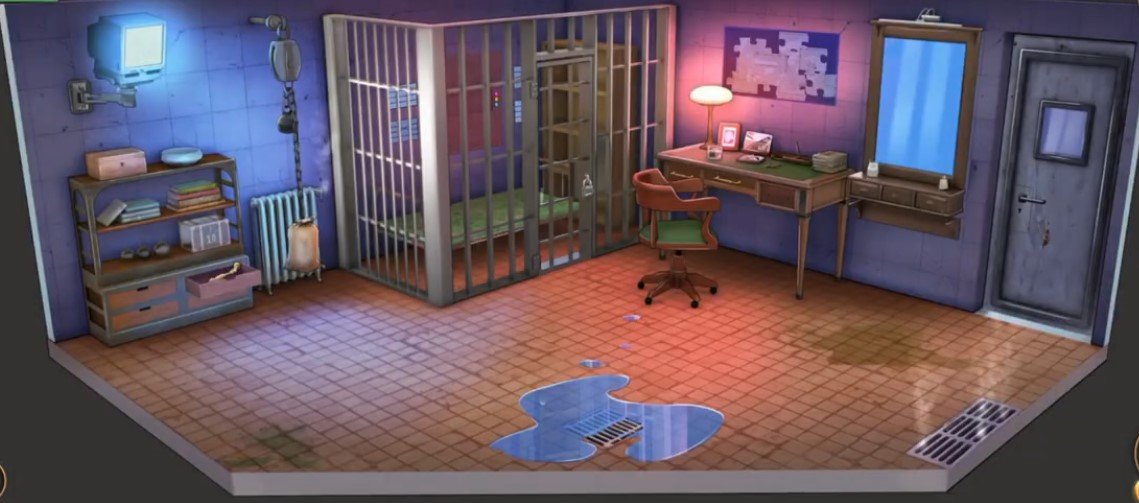
- Step 1: Tap the bookshelf on the left side of the room to inspect it.
- Step 2: Rotate the patterns on the book spines until all the shapes match correctly.
- Step 3: After solving the puzzle, a hidden compartment will open. Collect the gold drawer handle.
Get the Knife
- Step 4: Go to the wooden desk on the right side of the room.
- Step 5: Attach the gold drawer handle to the top drawer.
- Step 6: Open the drawer and collect the knife.
Find the Map Puzzle Piece
- Step 7: Use the knife to cut open the green armchair cushion.
- Step 8: Collect the crumpled paper hidden inside the cushion.
- Step 9: Open your inventory, select the paper, and use the Dismantle option to reveal the world map puzzle piece.
Complete the World Map Puzzle
- Step 10: Tap the framed world map above the desk.
- Step 11: Insert the missing puzzle piece into the map.
- Step 12: Rearrange all the map pieces until the world map is complete.
- Step 13: After solving the puzzle, collect the neon light tube that appears.
Reveal the Secret Code
- Step 14: Go to the large mirror above the sink.
- Step 15: Install the neon light tube into the light fixture above the mirror.
- Step 16: The UV light will reveal the hidden handprints. Note the code 514.
Unlock the Safe & Escape
- Step 17: Tap the silver wall safe near the jail cell bars.
- Step 18: Enter the code 514 to unlock the safe.
- Step 19: Collect the exit key from inside the safe.
- Step 20: Use the exit key on the main door and escape to complete Level 2
Video Walkthrough
Congratulations on completing Chapter 1 – Level 2! Click here to unlock Chapter 1 – Level 3.