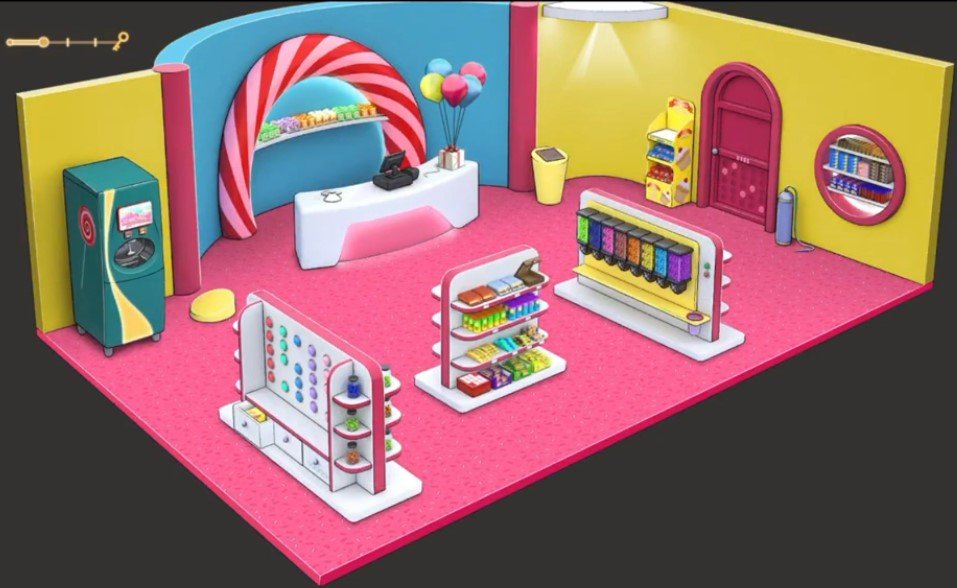
Here you will get solutions and step by step guide for Rooms & Exits Chapter 2 Level 6. In this puzzle developed by Webelinx Games. Every clue tells a story, and every puzzle brings you closer to the truth. Join Fiona, a brave journalist with a sharp eye for hidden secrets, as she investigates mysterious cases filled with unexpected surprises. This level belongs to the No Honor Among Thieves category and is the Candy Shop level.
Search for clues, solve challenging puzzles, and uncover the secrets hidden in every location. Each level offers a fresh mystery that will test your observation skills and logical thinking. Whether you enjoy detective stories, escape room challenges, or brain-teasing adventures, this game delivers an exciting experience from start to finish.

Rooms & Exits Candy Shop – Chapter 2 Level 6 Solution
The following guide explains how to solve Rooms and Exits Candy Shop step by step.
If you get stuck at any point, leave a comment below. Our team will be happy to help you find the solution.
Phase 1: Collect the Tools & Candy
Collect the First Items
- Step 1: Tap the checkout counter.
- Step 2: Collect the Silver Coin near the cash register.
- Step 3: Go to the decorative shelf on the right.
- Step 4: Collect the Toy Shovel.
Get the Brass Key
- Step 5: Go to the vintage gumball machine.
- Step 6: Insert the Silver Coin into the machine.
- Step 7: Turn the handle.
- Step 8: Collect the Brass Key from the delivery tray.
Collect the Colored Candies
- Step 9: Use the Brass Key to unlock the cupboard below the display table.
- Step 10: Collect the Empty Candy Jar.
- Step 11: Go to the candy bins.
- Step 12: Use the Toy Shovel to fill the jar with Red, Yellow, Blue, and Green Candies.
Phase 2: Solve the Candy Puzzles
Find the Candy Weights
- Step 1: Go to the electronic scale.
- Step 2: Place the Candy Jar on the scale.
- Step 3: Weigh each candy color separately.
- Step 4: Note the number assigned to each candy color.
Complete the Lollipop Puzzle
- Step 5: Tap the giant lollipop puzzle on the back wall.
- Step 6: Rotate and arrange the lollipop tiles until all colors and swirl patterns match.
- Step 7: Complete the puzzle to open the hidden drawer.
- Step 8: Collect the Electronic Key Fob.
Phase 3: Unlock the Register & Escape
Open the Cash Register
- Step 1: Return to the checkout counter.
- Step 2: Tap the cash register.
- Step 3: Enter the passcode using the candy weight sequence.
- Step 4: Open the register and collect the Magnetic Keycard.
Escape the Candy Shop
- Step 5: Go to the front exit doors.
- Step 6: Swipe the Magnetic Keycard through the card reader.
- Step 7: Tap the Electronic Key Fob on the proximity scanner.
- Step 8: Open the doors and escape to complete the level.
Video Walkthrough
Congratulations on completing Chapter 2 – Level 6! Click here to unlock Chapter 2 – Level 7.