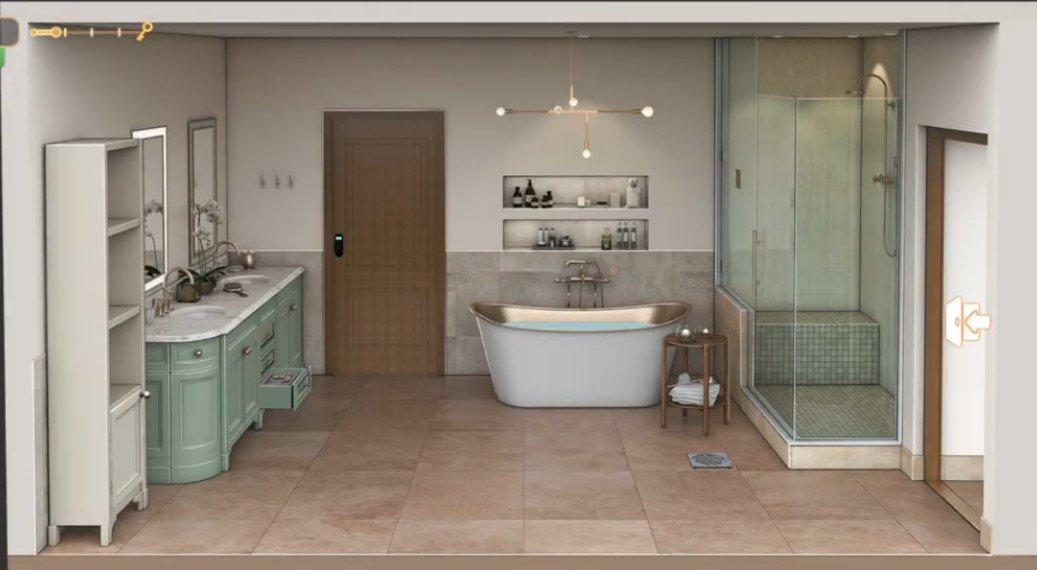
Here you will get solutions and step by step guide for Rooms & Exits Chapter 3 Level 7. In this puzzle developed by Webelinx Games. Every clue tells a story, and every puzzle brings you closer to the truth. Join Fiona, a brave journalist with a sharp eye for hidden secrets, as she investigates mysterious cases filled with unexpected surprises. This level belongs to the Murder Dressed in White category and is the Master Bathroom level.
Search for clues, solve challenging puzzles, and uncover the secrets hidden in every location. Each level offers a fresh mystery that will test your observation skills and logical thinking. Whether you enjoy detective stories, escape room challenges, or brain-teasing adventures, this game delivers an exciting experience from start to finish.

Rooms & Exits Master Bathroom – Chapter 3 Level 7 Solution
The following guide explains how to solve Rooms and Exits Master Bathroom step by step.
If you get stuck at any point, leave a comment below. Our team will be happy to help you find the solution.
Phase 1: Gathering Tools & Emptying the Bathtub
- Step 1: Tap the wall-mounted hand dryer/soap dispenser near the mirrors and collect the screwdriver placed on top.
- Step 2: Open the storage cabinet under the right sink and collect towels, a bar of soap, and a numbered chip marked 27.
- Step 3: Go to the towel storage shelving on the left.
- Step 4: Arrange towels in this order: 3 on the top shelf, 1 on the middle shelf, 5 on the bottom shelf.
- Step 5: After solving the arrangement, open the unlocked cabinet and collect the first mosaic puzzle piece.
- Step 6: Go to the floor drain and use the screwdriver to remove the grate.
- Step 7: Retrieve the water faucet handle from inside.
- Step 8: Go to the bathtub and attach the faucet handle to the empty stem.
- Step 9: Turn it to drain the water completely.
- Step 10: Collect the second mosaic puzzle piece from the empty bathtub.
Phase 2: Exploring the Adjoining Toilet Room
- Step 11: Enter the toilet room through the side door on the right.
- Step 12: Inspect the tissue dispenser and lift the cover to collect the second numbered chip marked 51.
- Step 13: Open the toilet lid and solve the small rotation puzzle cube to obtain the flushing lever handle.
- Step 14: Go to the mirror vanity drawers and activate the light sequence.
- Step 15: Form a rectangle using the lit drawer slots to unlock a hidden tray.
- Step 16: Collect the third numbered chip marked 16.
Phase 3: Tank Code & Shower Room Escape
- Step 17: Attach the flushing lever handle to the toilet tank.
- Step 18: Insert the numbered chips (27, 16, 51) into their slots.
- Step 19: Rearrange the digits to form the code 279151.
- Step 20: Open the tank and collect the third mosaic puzzle piece.
- Step 21: Go to the shower room.
- Step 22: Place all mosaic pieces into the wall grid.
- Step 23: Rotate them until the pattern aligns.
- Step 24: Reveal the final code 6389.
- Step 25: Go to the exit door.
- Step 26: Enter 6389 into the keypad and open the door to complete the level.
Video Walkthrough
Congratulations on completing Chapter 3 – Level 7! Click here to unlock Chapter 3 – Level 8.